Ranzha's Skewb Method — For Beginners
Hello! If you're a beginner to Skewb solving, here's the place to be! I recommend that you know how the Skewb turns as well as notation. You don't need to know how to solve a Skewb before looking at this tutorial, but I'd recommend having a working understanding of how the puzzle operates before looking into this method. The goal of this tutorial is to by the end have a solved Skewb.Jump to: Step One | Step Two | Step Three | Step Four
Step One: The Petrus Block

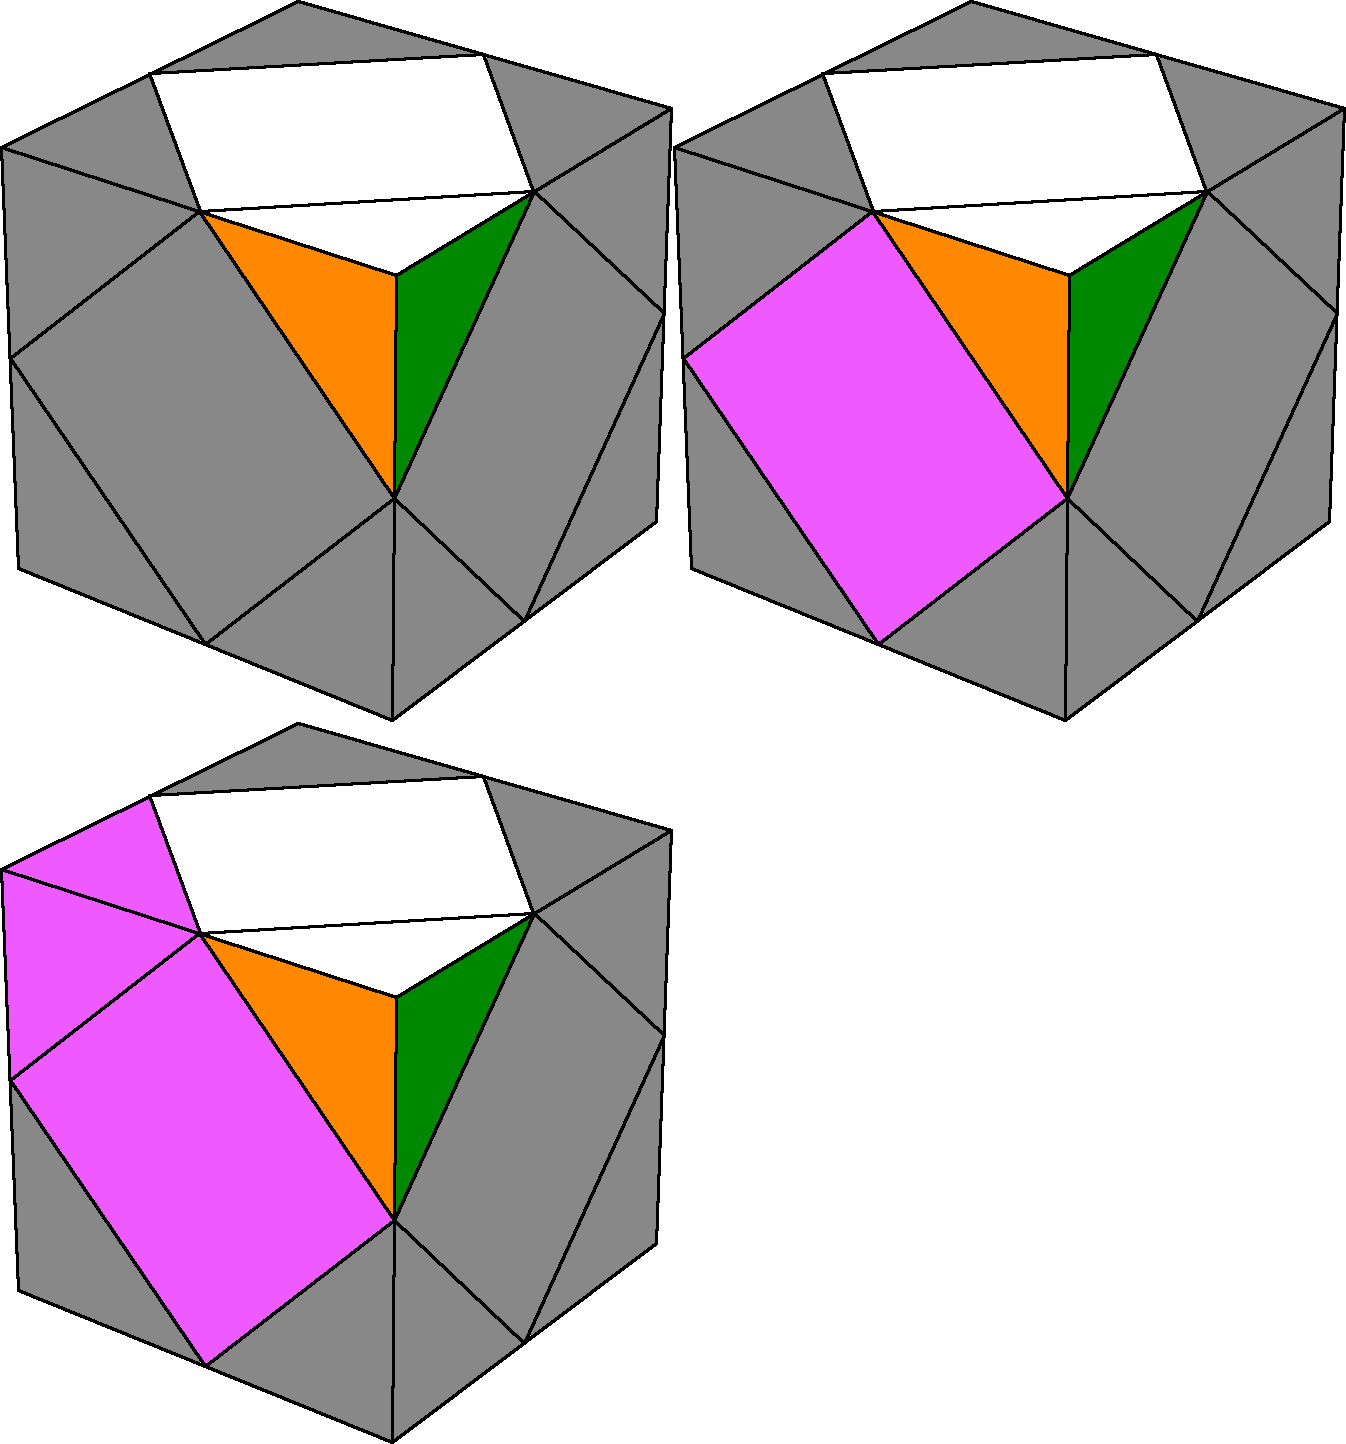
This step can be solved optimally in no more than five moves and is completely intuitive. However, as this is a tutorial for beginners, a beginner's intuition may not serve to keenly as to the formation of the Petrus Block.
For this reason, below are some substeps (with inspiration from Mike Tryczak) that should aid in Petrus Block building.


Since we're going to be attaching two pieces to our current block from substep 1a, it should be noted that there are three ways of doing this, two of which are beginner-friendly. Here they are:
| Attach the center first, and then the corner. |

|

|
Attach the corner first, and then the center. |

Attaching the following corner piece isn't as easy. Using the compulsory piece insertion technique "open slot, insert piece, close slot", we can attach the final corner of our Petrus Block. First, try positioning the corner in the position as indicated at left.
Positioning this corner here is the perfect setup for our open, position, and close technique. By doing r f r', the corner becomes attached to the block, completing it.
Once attached, the corner is in the correct position ("permutation") but may not be twisted ("oriented") correctly. Here are the possibilities and how to solve each unsolved case.
| Solved | Clockwise | Anticlockwise |
 Step is solved! |
 r f' r' l r f r' |
 r f' r' l' r f r' |
Now, the Petrus Block should be solved! Here's the other way of solving the last two pieces of the Petrus Block. If you don't care to read, click here to jump to Step Two: The Welder's Mask.
Attaching the following center piece can be difficult at first, but the task becomes easy once you get the hang of it. Luckily, the final center of the Petrus Block can be solved in at most four moves.
However, as optimality isn't our ultimate goal in this tutorial, to make this process both easy and efficient, here is a more streamlined approach.

Then, holding the Skewb as the image shows, use the Sledgehammer algorithm: f' r f r'.
The Sledgehammer (or simply "Sledge") and its inverse (the Hedgeslammer, or "Hedge") are arguably the most important of all Skewb algorithms.
Now, the Petrus Block should be solved!
Step Two: The Welder's Mask
In this step, we'll finish the top face, depicted as the white face.

- This step only uses f and r turns, which don't disrupt the Petrus Block in the top left.
- These corners are not interchangeable.
- The bottom layer corners will end up in the right positions.
We will first position the corners in the correct locations, and then orient them with the use of four short algorithms.

This substep can be completed intuitively in two moves or less.
You should be able to figure out intuitively which moves to do in order to permute these corners. Just make sure that the Petrus Block is NEVER broken during this step.
Here is how to do it, just in case:
If a U-face corner is in DFL, do f to move it to the UFR position.
If a U-face corner is in DBR, do f' to move it to the UFR position.
If a U-face corner is in DFR, do r to move it to the UBR position.
If a U-face corner is in DBL, do r' to move it to the UBR position.
| UFR Anticlockwise | UFR Clockwise | UBR Anticlockwise | UBR Clockwise |
 r f r' f' |
 f r f' r' |
 r' f' r f |
 f' r' f r |
Step Three: Last Four Centers

(hover for hidden faces)
If your Skewb has 0 unsolved centers (that is, all of your Skewb's centers are solved) proceed to Step Four by clicking here.
There are a total of six unsolved cases for this step. Use y rotations so that your Skewb's centers are being solved as the pictures denote.
(hover for hidden faces)
|
U R-L-D |
Oa R-D-F |
Ob R-F-D |
 f' r f r' y2 f' r f r' |
 y2 r f r' f' y' f' r' f r |
 y f' r' f r y r f r' f' |
(hover for hidden faces)
|
H F-B, R-D |
Za F-R, B-D |
Zb F-D, R-B |
 f' r f r' |
 (r f r' f')(r f r' f')(r f r' f') |
 (f' r' f r)(f' r' f r)(f' r' f r) |
Step Four: Corners of the Last Layer
At this stage, the only thing left to do is to correctly twist the corners of the bottom layer.

To solve the corners of the last layer, we will use the Sledgehammer f' r f r' various numbers of times.
| Peanut | (f' r f r')(f' r f r') y (f' r f r')(f' r f r') |
 |
|
| Pi | (f' r f r')(f' r f r') |
 |
